Earth plasters are wonderful because you can use soil that was dug from your foundation, or a truck can deliver a load of clay soil that was dug from another construction site. But anyone who has a pile of clay soil sitting on their jobsite knows that it’s hard to process. It can be rock hard, or incredibly sticky globs, and often contains stones that need to be sieved out. Here’s how to process clay into slip for use in earth plasters.
You need a very good drill that can withstand running for hours, and a barrel with one end open. Fill the barrel about 1/3 full of water, measure exactly how much you are using because you need to keep the slip consistent if you’re going to use it in earth plaster recipes. make a setup to hold the drill in place (some drills or paddle mixers have attachment points for this, others you may need to use All Round steel strapping (found in plumbing section of stores) or some other ingenious method.
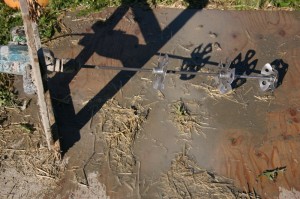
You’ll also need a very good paddle mixing attachment, I used the Kraft Tools DC303, a 24″ mixer with three propeller blades to keep the slip moving even as it gets thick. Since the blades are removable from the shaft, which is somewhat too short for barrel mixing, I bought a separate metal rod which I cut to length and used that as the shaft. Alternately you could cut the barrel down to match the shaft length. I know someone else who uses a boat propeller attached to a shaft on his drill to stir the slip – which was the best setup I’ve seen to date.
Start the mixer spinning in the water before you start adding clay to the barrel, once you have a vortex start adding the clay. Keep careful track of how much clay you are adding relative to the water. I find about 2 clay: 1 water is quite manageable, and that is about the minimum you want for your recipes. If you can get more (up to 3 clay : 1 water is possible) it will give you more flexibility in your recipes, since thin clay slip will make for wet plaster.
Once all the clay is in you’ll probably want to leave it spinning for at least an hour, and sometime in the middle you should stir up the bottom, either by moving the mixer around, or pull it out for a minute and stir it up with a shovel.
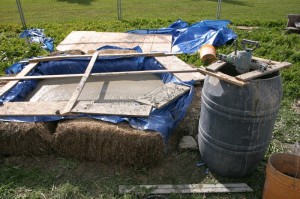
When the slip is well mixed, pour it through a screen (diamond lath works for rough plasters, you’ll want something finer for finish plasters) into a holding tub or trough. You can easily make one with a new tarp and some bales. You’ll want to process a couple of barrels of slip before you start mixing plaster, or you’ll get behind on slip. And that’s it – keep it well covered when you’re not using it to keep rain, frogs, leaves etc. out of the slip. Happy mudding!


I need the recipe for slip making in smaller quantities
Start with 2 clay:1 water. You can stir it with a paddle mixer or even a paint mixer (for smallest quantities) on a drill. I’d do an initial stir for a few minutes, let it sit a few days or more, then give it another good stir, for 5 or ten minutes. Seive out and throw away all the chunks. For thick slip aim for 3 clay:1 water.